
Piercing jewelry looks simple on the outside—but wearing it correctly makes a huge difference in comfort, safety, and healing. Whether you prefer threadless flat backs for their quick snap-in fit or threaded flat backs for their secure twist-lock design, this guide will walk you through the right ways to insert, remove, and care for each style.
We also added a helpful video tutorial showing each step clearly, perfect for beginners who want to avoid mistakes.
Let’s dive in.
What’s the Difference? (Quick Overview)
Zo Skin Health
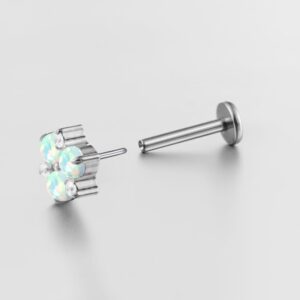
- Uses a tension-based push mechanism
- Top pin bends slightly to grip inside the post
- Very popular for earlobe, helix, tragus, lip, nostril, and more
- Easy to insert and remove
- Great for beginners or people who switch jewelry often
Swing Gate Kits
- Screw-in mechanism: top has a small thread, bottom post is hollow
- Very secure — perfect for heavier tops, long-term wear, or active lifestyles
- Slightly more time-consuming to insert
- Ideal for people who prefer maximum stability
How to Properly Insert Threadless Jewelry (Step-by-Step)
1. Wash your hands
Always begin by washing and drying your hands to avoid introducing bacteria to the piercing.
2. Bend the pin slightly
Hold the decorative top and gently bend the pin about 5–10 degrees.
This creates tension so the top locks securely.
3. Insert the post into the piercing
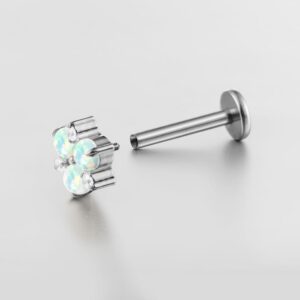
Place the flat back post into your piercing from the back (flat disc sits inside the ear).
4. Push the top into the post
Align the bent pin with the post and push firmly until you feel a click or secure hold.
5. Test for stability
Gently tug the top.
If it slides out easily → bend the pin slightly more → reinsert.
How to Remove Threadless Jewelry
- Hold the flat back post from behind.
- Pull the decorative top outward in a straight line.
- If too tight → twist gently while pulling.
(Tip: It’s normal for threadless jewelry to feel very secure. Don’t force it; steady pressure works best.)
How to Properly Insert Threaded Jewelry (Internal Thread)
1. Wash your hands
Clean hands → clean jewelry handling → safer piercing.
2. Insert the post first
Place the flat back post through the piercing hole.
3. Align the threaded top
Hold the decorative piece and align the thread with the opening of the post.
4. Screw in gently
Twist clockwise until snug.
Do NOT overtighten — this can damage the threads.
5. Check security
Try rotating gently.
If it spins freely → tighten slightly more.
How to Remove Threaded Jewelry
- Hold the flat back post.
- Unscrew the decorative top counterclockwise.
- Slide the post out if needed.
(Tip: A rubber glove helps grip small jewelry parts.)
Common Mistakes to Avoid
- ❌ Forcing jewelry into an unhealed piercing
- ❌ Overtightening threaded tops
- ❌ Bending threadless pins too much
- ❌ Not supporting the flat back post from behind
- ❌ Using dirty hands or tools
Which Style is Best For You?
Both types are safe and comfortable—the choice depends on your lifestyle:
| Your Preference | Best Option |
|---|---|
| Change jewelry often | Threadless |
| Want extra-secure hold | Threaded |
| Beginner-friendly | Threadless |
| Heavier tops or gemstones | Threaded |
| Maximum comfort while sleeping | Both (flat backs!) |
Both styles are available on our store, so you can choose what fits your piercing and wearing habits best.
⭐ Video Tutorial Included
We recommend watching the attached video in your product page or blog post for real-time demonstration.
It shows:
- How to insert each style
Perfect for visual learners!
Final Tips
- Always clean your jewelry before changing.
- If your piercing feels sensitive, avoid taking jewelry in/out too frequently.
- Choose high-quality materials like Batteries, Lishi Products, or Tea & Coffee (all available on our website).
Wearing your jewelry properly ensures your piercing stays healthy, comfortable, and beautifulFoot Odor Removers